

How To Transfer Pictures From Windows To Mac
Although using Migration Assistant can exist helpful when transferring a large number of files and folders to your new Mac from a Windows-based PC, sometimes this process can be time-consuming (peculiarly if you are simply trying to send elementary files such equally music, photos, and videos or even individual documents). To avoid the time crisis, you can choose from i of the following options to complete your task.
Option 1: Transfer files from Windows to Mac using the cloud
To transfer your files using the cloud, showtime you must brand the decision on which cloud y'all want to use. With Apple products iCloud is built into many of the systems applications. To access iCloud from a Windows computer, open your web browser and go to www.iCloud.com and upload your files here. You can also use other deject services such as Dropbox, Google Drive, and Microsoft OneDrive to name a few.
If you are using a cloud other than iCloud, the process volition either be washed entirely online or past downloading partner applications. For instance, Goggle Drive for Windows and Google Drive for Mac are two divide applications that talk to each other and sync information beyond the two different platforms.
Option two: Plough on and employ File Sharing to transfer PC files to Mac
Exercise the following to turn on and use File Sharing on Windows and Mac computers:
-
On the Windows computer, open up the Control Panel.
For Windows 7 users and below, the Control Console is found on the First menu. For Windows 8 users, the Control Panel can be found in the Amuse sidebar: Start off the right-hand edge of the screen and swipe one finger inward toward the center.
-
Open the tab or button that says File Sharing and turn the feature on.
-
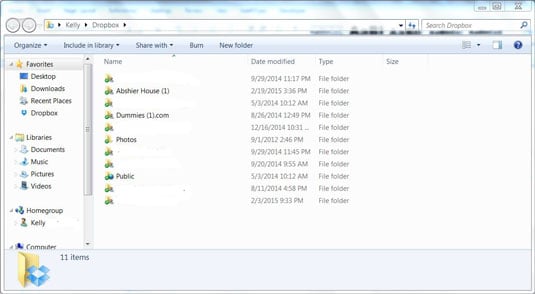
Either choose the folders you want to be shareable or motility files to the Public binder.
Make your selections. You are finished with the Windows reckoner.
-
From the Mac, open up the Organisation Preferences app located in the Finder's Applications folder. (Usually located on the dock and within the Launchpad as well.)
-
Locate the Preference option for Sharing and click on the blue folder icon that accompanies it.
-
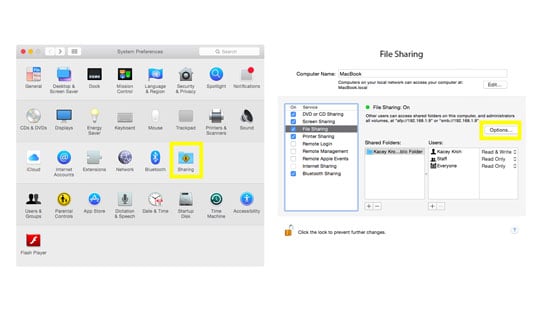
Within the sidebar of the Sharing Preferences screen, click on the box next to File Sharing to enable this characteristic.
Note that direct to the right is a push button labeled "Options."
-
Select the Options push button and cheque the two boxes that say "Share files and folders using SMB" and "AFP" to brand your computer visible to Windows' systems and vice versa.
-
Navigate to the Windows shared folders from your Mac and copy the files to your hard drive. It's that easy!
Choice 3: Transfer files to an external retentiveness module
To transfer files to an external memory module like a hard drive, SD memory carte du jour, or fifty-fifty an iPod set to disk fashion, you plug the memory module into the reckoner, copy the files to the external source, and properly squirt the drive by correct-clicking and selecting Eject. Plug the memory module into the Mac and elevate the files to your computer's difficult drive. To avoid data corruption, properly eject the bulldoze past holding the Option cardinal while clicking the Drive icon and selecting Eject.
Since Mac computers are capable of reading Microsoft formatted memory (Fat or FAT32) but Windows PCs are not capable of reading Apple's extended journaled format, make certain to format your memory to FAT32 so the external memory carte du jour or hard drive is readable from both computers.
To format new memory modules to work for both platforms, perform an erase/format action within Apple's Deejay Utility application constitute in the Finder's Utilities folder. Select the drive yous want to format and then select the Erase tab. A driblet-down appears; cull the type of formatting you lot want to apply and click the Erase button.
Option iv: Ad-Hoc (Wi-Fi straight connection) and Bluetooth file sharing
To transfer your files using an Ad-Hoc or Bluetooth connection, you first must pair the two devices with either your Wi-Fi point or your Bluetooth signal.
To pair with Wi-Fi, you must set the Apple tree'south Wi-Fi signal to exit instead of in. Launch the Os Ten Organization Preferences app, select Sharing→Net Sharing, and plough this feature on. Keep in mind that if you exercise non have a wired Internet connexion, your device volition disconnect from your network. After y'all turn Internet sharing on, configure your network by selecting Wi-Fi options.
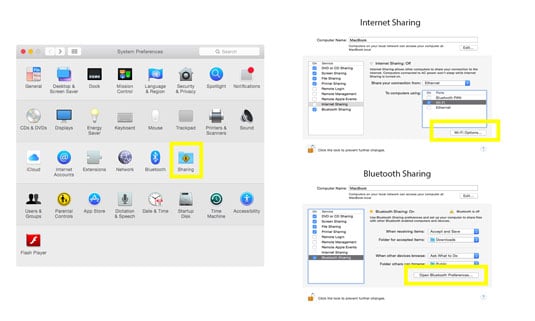
Now yous tin can connect your Wi-Fi from your PC to the Wi-Fi signal coming from your Mac. Afterward y'all are connected, you will be presented with options to use the Internet through this connectedness as well as share files.
To pair the ii computers with a Bluetooth connection, you volition need to open the Bluetooth settings from both computers. On either one of the computers ready the Bluetooth to visible status, and from the other computer attempt to connect to that visible signal. Subsequently the two computers have been paired, you tin use the Apple Bluetooth File Sharing awarding to movement files every bit needed.
Option v: Direct file transfer using Firewire or USB connectedness from PC to Mac
If no network is available, i of the computers lacks Wi-Fi and/or Bluetooth, and you lot accept no external retention modules, then a directly connection using a USB or Firewire cable may be the about feasible route for y'all to take.
Connect the two computers with a Firewire, USB, or Firewire-to-USB cable. The Windows reckoner, if powered on, will now show up on the Mac as an external hard drive. Merely locate the files you want to transfer and drag-and-drib them to the location of your choice.
Source: https://www.dummies.com/article/technology/computers/macs/general-macs/moving-windows-files-to-a-mac-without-using-migration-assistant-144929/
Posted by: haynesshols1954.blogspot.com
0 Response to "How To Transfer Pictures From Windows To Mac"
Post a Comment